Poultry

Brining - A MUST for great tasting poultry

16 February, 2014


Brining is the process of soaking meat in salt, sugar, and season solution to make it more flavorful and juicy. There is a very logical and scientific reason for why this works, but I'll spare you my attempt to explain the details. (If you are really interested in the details, check out Alton Brown's explanation on the science behind brining) While this technique works on any lean meat (pork, turkey, chicken, and fish), I generally only brine when cooking poultry. It's a basic technique, and will result in a MUCH better final product. 

Many recipes call for "cooking" a brine to dissolve the ingredients. However, I've had good success by just adding my ingredients directly to cold water. If you are cooking your recipe, make sure that the brine is chilled before adding the chicken. Also, make sure the meat is completely submerged in the liquid. You can use any non-reactive container such as a ziplock bag or a plastic container. I prefer to use a small food grade buckets with a lid. The 2 gallon version holds 2 chickens, won't tip over, and is easy to clean up. 

Add the basic ingredients to your container, fill with about 2 quarts of water, stir frequently until salt and sugar are dissolved, add chicken, and place in the refrigerator. Brine times depend on the size of poultry you are cooking. (Some sample times are listed below) When you are done brining, it's VERY important to rinse the poultry extremely well before prepping the bird for cooking. The brine liquid needs to be removed or you will have a very salty tasting meal. 


Basic Brine Recipe

1 cup Kosher Salt

1 cup Brown Sugar

2 Quarts Water


Some alternate ingredients

2 cups Pineapple juice

1 cup garlic powder

1 cup apple juice

Pepper, Jalapeño powder, cayenne pepper, molasses, honey


Basic Brine Times

Whole Turkey: 12 - 14 hours

Whole Chicken: 6- 8 hours

Chicken Breasts: 2 hours

Chicken Thighs: 1.5 hours

Chicken Wings: no need to brine


Smoked Turkey

06 November, 2013

It's that time of year again, so let's talk turkey, or more importantly, smoked turkey. 

Shopping

I like a fresh smaller bird in the 10 – 12 pound range. (Frozen will work, but give it ample time to thaw in the refrigerator. This can take several days) The smaller birds will cook a little faster and seem to be more tender and juicy. Look for a bird that is not "enhanced" or "kosher" as these turkeys contain extra salt added at the factory.

Brining

The next step is to brine the bird. (Brining is the process of submerging a protein in a mixture of salt, sugar, and spices in order to create a juicer and more flavorful product)  I prefer a cold brine where the ingredients are mixed in cold water. My basic recipe is listed below. 

1      Cup Kosher Salt

1      Cup Brown Sugar

1/2   Cup Garlic Powder

2      Cups Pinneapple Juice

3-4   Quarts Water (enough to cover bird)

The turkey needs to be submerged in the brine for 10-14 hours. A small cooler, large ziplock bag, or bucket works well. I prefer the small 2 gallon buckets available at Home Depot or Lowes. They come with a lid and fit nicely into the fridge.  I typically put the dry ingredients in the bucket, add the pineapple juice, water, and then whisk thoroughly to ensure spices are dissolved. Put the bird breast side down, and immediately place in the fridge.

When the brine is complete, RINSE THE BIRD THOROUGHLY or it will be overly salty. Pat down the bird with a paper towel. 

Seasoning

Slather the turkey with ranch dressing. (use the real stuff, no low fat substitutions). 

Season liberally with Classic Cruiser. For a bird with a kick, add some Petal to the Metal to the top. Make sure you work the seasoning under the skin and directly onto the meat wherever possible. 

Cooking

Get your smoker temp to 275 or 300.   For poultry, I prefer to use "lighter" woods such as apple or peach, however, oak, hickory, and pecan will also work. (I'd suggest staying away from mesquite for this cook) Put the turkey in a foil or roasting pan breast side up and smoke bird uncovered for about 1 hour.  Add some apple juice (about 3 cups) to bottom of pan, cover with foil, and cook an additional 2 hours. (I actually start checking the bird around the 2.5 hour mark to make sure it's not moving along faster than expected)

The absolute KEY to a great bird, is cooking it to the proper internal temperature. For poultry, the breast needs to read 165 degrees in order to be safe. I rely on either my Maverick ET732 or my PT100 to accurately measure the temp. If you cook regularly, one of these tools is a must. 

Once it's reached that magical temp, pull from smoker and lest rest for about 30 minutes.  

Don't forget, our spices are well balanced so you can add some additional flavor to the carved meat. I like to dust a small section of dark meat with Petal to the Metal and set aside for the cook!

You are ready to serve and eat.


X

Beer Can Chicken

17 October, 2013

One of my favorite ways to prepare a whole chicken is the “beer can” or “dancing” method. The bird is cooked in an upright or “dancing” position and perched on top of an open beer or coke can. The moisture from the canister helps prevent the chicken from drying out. The steps to cook and prep are simple, and it will produce the juiciest chicken you’ve ever served.

Traditionally, the cook needed to navigate the tail end of a chicken across the top of a beer can, and then balance the two on top of the grill. This can be quite cumbersome and often results in the can tipping over and dousing the fire. Thanks to some innovative new products, cooking in this method is much easier. Rusted Truck Ranch is proud to offer the Stainless Steel Chicken Roaster from Cameron Products. This nifty stand replaces the beer or coke can and provides a much more stable foundation to “dance” on.

First step, BRINE the chicken. Soak your bird in a solution of water and salt. This process makes the chicken moist by holding moisture during the cooking process. You can use a plastic bag, small cooler, or large bowl to bring.  A basic brine recipe is below. 

2 Quarts of Water
1 cup of Kosher Salt
1 cup of Brown Sugar
Combine and stir to dissolve
Insert bird and refrigerate for 6 - 8 hours


Make sure you place your chicken or poultry in a COLD brine. We don't want to start the cooking process by dunking in hot or warm water. 

When the brining is complete, rinse the bird THOROUGHLY in cold water.  Coat the chicken in ranch dressing and apply Classic Cruiser and or Petal to the Metal. Next, add your liquid to the beer roaster canister. I generally use light beer or apple juice. Slide the chicken on to the roaster stand, and you are ready to begin cooking.   

Chicken should go on at a temp around 275 degrees. If cooking in an offset smoker, make sure the bird is placed in an area that won’t receive any flare ups from the fire. Total grill time will be about 3 hours. Cook the chicken un-covered for about 1.5 hours. This allows the meat to absorb a nice smokey flavor. At the half way point, I cover the bird with foil creating a tent over the chicken. This tent helps maintain the moisture and prevents the chicken from drying out. I continue cooking with this configuration for the remaining 1.5 hours.

When the bird reaches 165 degrees in the white meat, and 185 degrees in the dark meat, it’s ready to serve. I use my PT100 quick read thermometer to ensure the meat is done (make sure the thermometer doesn’t touch bone)

Lay the chicken on the cutting board and use a knife to remove the breast meat. Next, cut off the wings and legs, and then continue working removing the meat separating into two piles – white and dark.

Suggested Serving:

Chicken Wings

07 September, 2013

CHICKEN WINGS

Chicken wings are a great addition to any backyard hero’s set of offerings. They are inexpensive, you can buy them in bulk, and they work equally well as an appetizer or main course. Plus, they are great smoked on the Big Green Egg, grilled on a Webber, or cooked on the gas grill.

PREP

Prep for wings is pretty straight forward, but there are a couple of options to consider. In most restaurants, wings are traditionally served cut. “Cut” refers to the separation of the drumette (upper wing) and mid wing, and often includes clipping the wing tip.

1. Separate drumstick from the wing
2. Use a sharp knife to cut between the bones
3. Discard the wing tip


Personally, I prefer to cook wings whole. With fewer pieces to tend, it’s much easier to manage a big batch on the grill. If cooking in this style, it’s as simple as washing the wings and moving to the seasoning step.

SEASONING

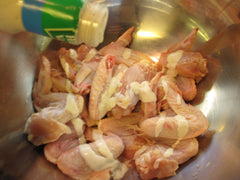
After washing the wings, I like to coat the pieces in a layer of ranch dressing. It provides a nice flavor profile and a great base for the dry rub that will follow. Drop the wings in a large bowl, add ranch dressing, and toss.

Next, sprinkle a layer of baking powder on the skin of the wings and place the bowl in the fridge. The baking powder helps promote a drying of the skin, ultimately resulting in a crispy outer shell. Ideally, the wings will sit in the fridge for around 2 hours. 


Fifteen minutes prior to cook time, pull the wings and sprinkle a liberal coat of dry rub. I like Classic Cruiser for a wing with a little sweet, and Pedal to the Metal for a version with a little heat. 


COOKING

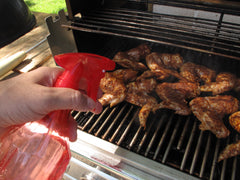
There are a few things to consider when cooking the wings. Wings are a small piece of meat, and will absorb smoke very quickly. If you are cooking them alongside other slow cook items, make sure and wrap the birds after 20 or 30 minutes. Also, wings tend to flare up over high heat. The grease from the skin drips onto the fire and will cause flames to char your birds. In an offset smoker, this generally isn’t a problem. If cooking on an egg or gas grill, you have to monitor the wings on a regular basis. Some people use a squirt bottle to gently douse hot spots on their grill. You can also move your wings to an elevated rack or utilize foil pans to prevent charring.

Second, crispy skin is much easier to achieve with high heat. (In the competitive BBQ circuit, crispy skin is often considered as the hallmark of good chicken) Many BBQ cooks will slow cook their birds, and then transfer to a hotter portion of the grill (or separate cooker altogether) to finish their chicken. The same rules can be applied to wings. Smoke ’em low and slow for 15 or 20 minutes, then move to high heat for finish. Wings are done when they reach an internal temperature of 180 degrees. If cooking whole, you can also tell for doneness by tearing a wing from the drumstick. If the two pieces separate with little effort, you are ready to serve.

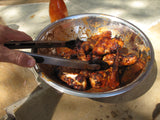
If you prefer a glazed wing, remove them a few minutes before cooking is complete. Toss in a metal bowl of your favorite sauce, and then return them to the fire for 5 or 10 minutes. This will help caramelize the sauce to the wings.


Suggested Serving: