Gear & Techniques

Fuel for your Food

08 October, 2014

One of the most important factors in making that great slice of brisket or the perfect grilled steak is the fuel used in your cooking process. While gas grills offer a level of convenience, great food requires combustion from natural fuels to produce the flavor and aroma we crave from outdoor cooking. Here are a few tips and notes regarding smoke, wood, and charcoal. 

A little information about SMOKE

Aim to produce a “light blue” smoke. Thick white or gray smoke is not ideal, and with extended exposure, it can produce off flavors in your food.

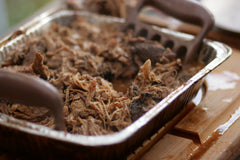
Smoke is a great addition to meat. However, be careful not to apply too much.

Wrapping your meat in foil can reduce smoke density on long cooks.

Chicken and Fish are more sensitive to over smoking, while Pork and Beef can handle a more intense smoke flavor.

WOOD for flavor CHARCOAL for heat

Generally speaking, I burn a mixture of charcoal and wood in all my pits (Offset, Vertical, Kamado Joe, Weber).


I start all of my fires with a base of charcoal. Once the smoker is close to the appropriate temperature, I add wood (logs or chunks) to produce smoke and flavor. 

When the fire needs additional fuel, I continue to add a mix of charcoal and wood. 

WOOD Do’s and Don’ts

Use dried hardwood, nut wood or fruitwood from trees such as Mesquite, Pecan, Oak, Apple, Cherry or Peach.

Fruit trees will give a lighter and sweeter smoke flavor, and are often used on fish and chicken.

Woods such as Hickory, Oak, and Pecan produce a stronger more distinct smoke flavor. I tend to use these when smoking beef and pork.

Split the wood as opposed to burning whole logs. More surface area makes for a more even burning fire.

Mesquite has a distinct flavor and burns the hottest. It is very accessible in Texas and the South. When used during smoking, it can be overwhelming.

Use chunks over chips. Chunks are about the size of your fist. They burn slower and produce smoke over a longer time frame. My favorite brand is Western Woods available at most Academy Sports stores.

Don’t use fresh cut or green wood. It can produce off flavors due to the excessive moisture. It also takes more energy to burn

Don’t use wood from conifers: pine, fir, spruce, redwood, cedar or cypress.

Don’t soak your wood or chips. Soaking wood even for extended periods of time results in very little penetration of water.

CHARCOAL

Charcoal is made by cooking wood in a very low oxygen environment.

It burns hotter, more consistent, and cleaner than natural wood.

Charcoal BRIQUETTES

Briquettes are the square pieces of compressed ground charcoal that we commonly associate with Kingsford.


They are made from scraps of wood and sawdust, and use additional “fillers” to hold the ground pieces into their form.

Many people believe briquettes put off a foul smell when burning. Quite frankly, I don’t believe this to be true. I’ve smoked 100’s of briskets in my Pitmaker Vertical smoker without any hint of off flavors.

When lit using a charcoal chimney, briquettes can be a great source of energy for you pit.

Never use Match-Light or lighter fluid with briquettes. Those additives can produce off flavors in your food.

LUMP charcoal

Lump charcoal is made from hardwood chunks, logs, and scraps. Size and shape will vary depending on the base material used in the process.

Lump burns hotter and cleaner than processed charcoals. It also produces less ash.

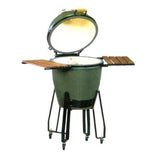
If using an Egg or similar Komodo type cooker, lump is a must. (As the ash falls through the holes in the bottom of the cooker, there isn’t a great deal of room for that waste)

While lump is generally more expensive, the absence of fillers makes it comparable in price to the price of briquettes.

Some of my favorite brands are B&B and Ozark oak. 


EXTRA bits and pieces

You can add fruits and vegetables to your fire for additional smoke flavor.

I LOVE to throw full cloves of garlic on my Kamado Joe when cooking chicken. You can also add dried herbs to your smoker or grill for some additional flavor infusion. Place them on the edges of the fire so they slowly smolder during cooking. 


How much should I cook?

23 April, 2014

As your BBQ Skills increase, so will the number of neighbors asking you to cook for their event. Figuring out how much to make for 6 or 8 is an easy proposition, but knowing quantities for 40 or 50 can be a different task. Below are some notes to help ensure you don’t finish an event with a room full of people hungry.


MEAT

Brisket/Pulled Pork

As you know, the cooking process reduces the meat's total weight. Ten pounds of raw meat does not produce ten pounds of editable meat. The reduction factor, or YIELD, is especially important when cooking brisket and pulled pork. These two cuts yield between 55% and 60% of their raw weights. However, to simplify the math, and to be conservative, I use a 50% factor. 

For example, 10 lbs of raw brisket will produce 5 lbs of cooked meat.  (10 lbs x .5 = 5 lbs)

Now that we know the yield, how much of these meats should we serve? 

Amounts per person will range depending on the crew.  A team of football players will eat more than a crowd full of kids. Here are some basic metrics.

1/2 lb per person – Football team

1/3 lb per person - Adults and teens

1/4 lb per person - Kids

I generally prepare 1/2 lb of cooked meat per person, regardless of the crowd. As I stated above, I like to play it conservative. I’d much rather send folks home with leftovers than run out of food.

Chicken, Sausage and Ribs

Chicken, Sausage and Ribs have a yield factor as well. However, the quantity is easily identifiable with these meats so I typically use a “piece per person” approach.

Chicken Breast – 1 per person

Chicken Thighs – 2 per person

Chicken Legs - 2 per person

Sausage Links – 1 per person

St. Louis Style Ribs - 1/3 rack per person

Baby Back Ribs – 1/2 rack per person

Two Meats

When serving 2 meats, it’s important that your guests get to try each option. While you can reduce the servings per meat, you will ultimately end up cooking more than with a single meat serving. For example, in a one meat setting, I would factor 1/2 pounds per person. In a two meat scenario, I’m actually preparing 2/3 pounds per person.

Here are some examples:

1/3 lb of brisket and 1/3 lb pulled pork

1/3 lb of brisket and 1/2 sausage link

1 chicken thigh and 1/3 lb of pulled pork

1/4 rack of St. Louis style ribs and 1/2 chicken breast

SIDES, SAUCE, AND SUCH

1 lb of raw PINTO BEANS per every 10 people

            Click here for RTR’s Shiner Bock Bean recipe

1/3 lb of raw potatoes per person when making POTATO SALAD

            Click here for RTR’s Jalapeno Ranch Potato Salad recipe

4 ounces of CREAM CORN per person

5 ounce of COLD SLAW per person

1/2 cob of WHOLE CORN per person

1 gallon of BBQ SAUCE per 50 people

1.2 ROLLS per person

Bear Paws

22 January, 2014

Bear paws are on of the newest products in our store, but have been a staple in my BBQ toolbox for quite some time. I found this product in a cooking forum a couple of years ago, and decided to give them a try. My expectations for their use were primarily built around the ability to shred (or pull) meat. That expectation was quickly expanded once I put these bad boys to work. 

One of the main challenges when barbecuing is handling hot meat. While tongs are great on smaller items (chicken wings and ribs), they simply aren’t effective on larger cuts of meat typically associated with smoking. (Try moving a 12lb brisket with a set of tongs and it will probably end up on the ground covered in dirt). This is where Bear Paws step in and become a much more effective option.

I routinely use my Bear Paws to move the position of a brisket, transfer a pork butt to foil for wrapping, or pull a beer can chicken from the grill. The paws keep my hand away from the hot meat, and their sharp ends ensure I that my perfectly smoked brisket doesn’t get donated to the dogs. I also use them to rotate my racks of ribs or flip my half chickens skin side down. They are a staple in my cooking activities, but their duties extend beyond just helping around the pit. 


My favorite use of this tool is in carving meat. As I stated in the opening paragraph, these tools are a no brainer when it comes to pulled pork. However, they are equally as impressive when carving brisket or chicken. The pointy ends are very useful when stabilizes a large cut of smoked meat. A pear paw in my left hand will stabilize the brisket MUCH better than a traditional meat fork, while right hand and knife does the delicate work.

I also regularly reach for my paws when serving meat. They act as a giant serving fork and I can quickly dish out brisket, pork, or chicken. 

Once the meal is complete, they go into the dishwasher for quick and easy clean up. Give this tool a try. It will quickly be one of your favorite pieces of equipment. 

The Biscuit Test

16 January, 2014

While I was working on some modifications to one of the pits, I utilized a trick I’d learned from another BBQ Vet. I thought this was a good one to pass along as it helps solve a critical component to successful cooking.

One of the main battles with producing great BBQ is managing the consistency of your cooking temperature. All cookers “breath” in a unique way, and understanding exactly how your pit handles the fire in it’s belly, is one of the key parts of controlling your cooking environment.

While temperature gauges are a great way to monitor your cooking temperature, they usually only tell part of the story.  Gauges are often mounted several inches above the actual location of the meat, and depending on the size of your smoker, they can be feet away from the source of fire. While the gauge location provides a decent reading for that particular location, it makes for some serious guessing as to the temps in other parts of your cooking surface. Unless you are prepared to add gauges every few inches all across the pit, it’s difficult to know how the intensity of the fire is being distributed across the cooking surface. The solution is easy and will only set you back a few bucks. 

The biscuit test, as you might guess, involves biscuits. Go figure. 

Go to the local grocery store and buy a can of the cheapest biscuits you can find. Build a basic smoking/cooking fire in your pit and spread the biscuits across the cooking surface making sure all areas have representation. (see image below) Now grab a cold beverage and sit back while your pit begins to tell you exactly how it’s performing.  

After some time is passed (5 or 10 minutes), you will begin to see the biscuits cook at a variety of speeds. Notice the image below. 

The biscuits on the right hand side are already browning on top, while the biscuits on the left hand side are still pearly white. The biscuit in the top row/middle also shows some browning, while the lower biscuit is still very doughy.

This basic information tells us the hot spots and cool spots in our pit, and provides valuable information on where to place our meat depending on the desired temp. For example, if I wanted to cook a bit faster, I might move the chicken thighs to the right side of the cook surface. If my pork loin is ready to serve but I’m a few minutes away from guest arriving, I might push it to the left side for warming. Or, I can use this information to tune my pit so that it responds in a more even fashion. (More on this topic later)

There you have it. Bet you never expected to cook raw biscuits in your smoker. Now that you’ve completed the test, it’s back to the good stuff. Anyone ready for some brisket?  

Pick your pit

07 November, 2013

PICK YOUR PIT

The debate over the best BBQ pit is something that will go on until the end of time. People are as passionate about their cooking tools as they are about their favorite sports team or brand of car. I’ve read many forums where this exact discussion continues on and on without resolution. In the end, it’s a question that doesn’t have a single answer. Well, a single answer that everyone can agree on.

In reality, the best pit to cook on is one you can control. Whether it’s a Webber kettle, Big Green Egg, offset or vertical smoker, round, square, or homemade from a 50 gallon barrel -if you can control or manage the temperature, you can produce high quality meats. Management and control are primarily functions of size of fire, air intake, pit material, and tightness of construction.

However, as equally important as the mechanics of your smoker is your familiarity with the cooker. The more wood you burn in a particular pit, the better you can manage the desired outcome. Some styles require a hotter and larger fire to maintain optimum temps, while others are capable of stability with a few lumps of coal and a minimum amount of oxygen. The science of fire is something we will discuss in a future blog. For now, let’s review a few different styles of pits.

Offset Smoker

This is one of the most popular styles for BBQ’ing. The design is generally constructed out of rolled steel, and has a firebox that is located to the side of the smoking chamber. The fire is built in this box ensuring the heat is not directly under the meat. The heat and smoke travel through the smoking chamber and get exhausted out of the stack or flu. The firebox generally has an air intake and the flu usually has a damper for temperature control. Capacity (number of racks of ribs for example) is usually ample in this style as the elongated smoking tube provides a great deal of cooking surface.

New Braunsfels Smoker

Komodo Cooker (Big Green Egg, Primo, or Grill Dome)

This is probably the fastest growing style of cooker. These units are built from 2” thick ceramic material in the shape of an egg. The fire burns beneath the meat and the heat is vented through an opening in the top. The ceramic makes them EXCELLENT at retaining heat. I often light my kamodo around midnight, get the temperature to 250, put on the brisket and go to bed. I can wake up, make a cup of coffee and the pit will still register 250 degrees. Capacity is somewhat limited, but usually ample for a family and a few neighbors.


      Big Green Egg

Webber Smokey Mountain

Webber produces an excellent style of BBQ smoker that is a more traditional style of vertical smoker. As with the kamodo style, the fire is built beneath the meat and vented through the top. The smoker has multiple racks for stacking various cuts on top of each other. As with many vertical smokers, this product includes a water pan feature that helps maintain pit moisture. Many people use this product in competitive cooking competitions and win top honors.


Webber Smokey Mountain – large and small size

Electric Smoker

This style of smoker is built in an upright fashion and uses electric heat to maintain its temperatures. Smoke flavor is added with the use of small wood chips or powdered wood. Temperature control is quite easy as the heat source is as consistent as the electricity in your house. While some people declare great success with an electric smoker, I simply don’t have the experience to support those claims.


Smoke Hollow electric smoker

Which style to purchase is really a factor of porch or backyard space you can dedicate, amount of food you desire to cook, and the price you are willing to pay. For those who want to cook a few racks of ribs each month or serve up a great brisket after a day of swimming for some neighborhood guests, I usually recommend a Komodo style cooker. I routinely cook for 15 or 20 people without any problem. Plus, once you learn how to build and control the fire, maintaining proper temperatures is VERY easy. Regardless of what unit you decide to purchase, a good smoker will be an anchor in your journey towards becoming a backyard hero.